Destroy Deployments
It is essential to destroy a deployment at the end of its life cycle so that no resources are left in place. With a proper destruction procedure, one can mitigate the accrued cost of AWS.
WARNING: Before deleting the deployments, developers will need to account for the following:
- When deleting the
CloudFormationstack, the deletion order matters. - Delete some of the
CloudFormationstacks before deleting ECR. - The name of the items you're deleting may differ depending on the deployment you are taking down. For example, your deployment's
CloudFormationstack may not have aregionname. - Do NOT take down the
CognitoandCloudWatchlogs. These are used for statistical analysis later on.
Removing CloudFormation Stacks
When you first go to CloudFormation, it should look something like the following:
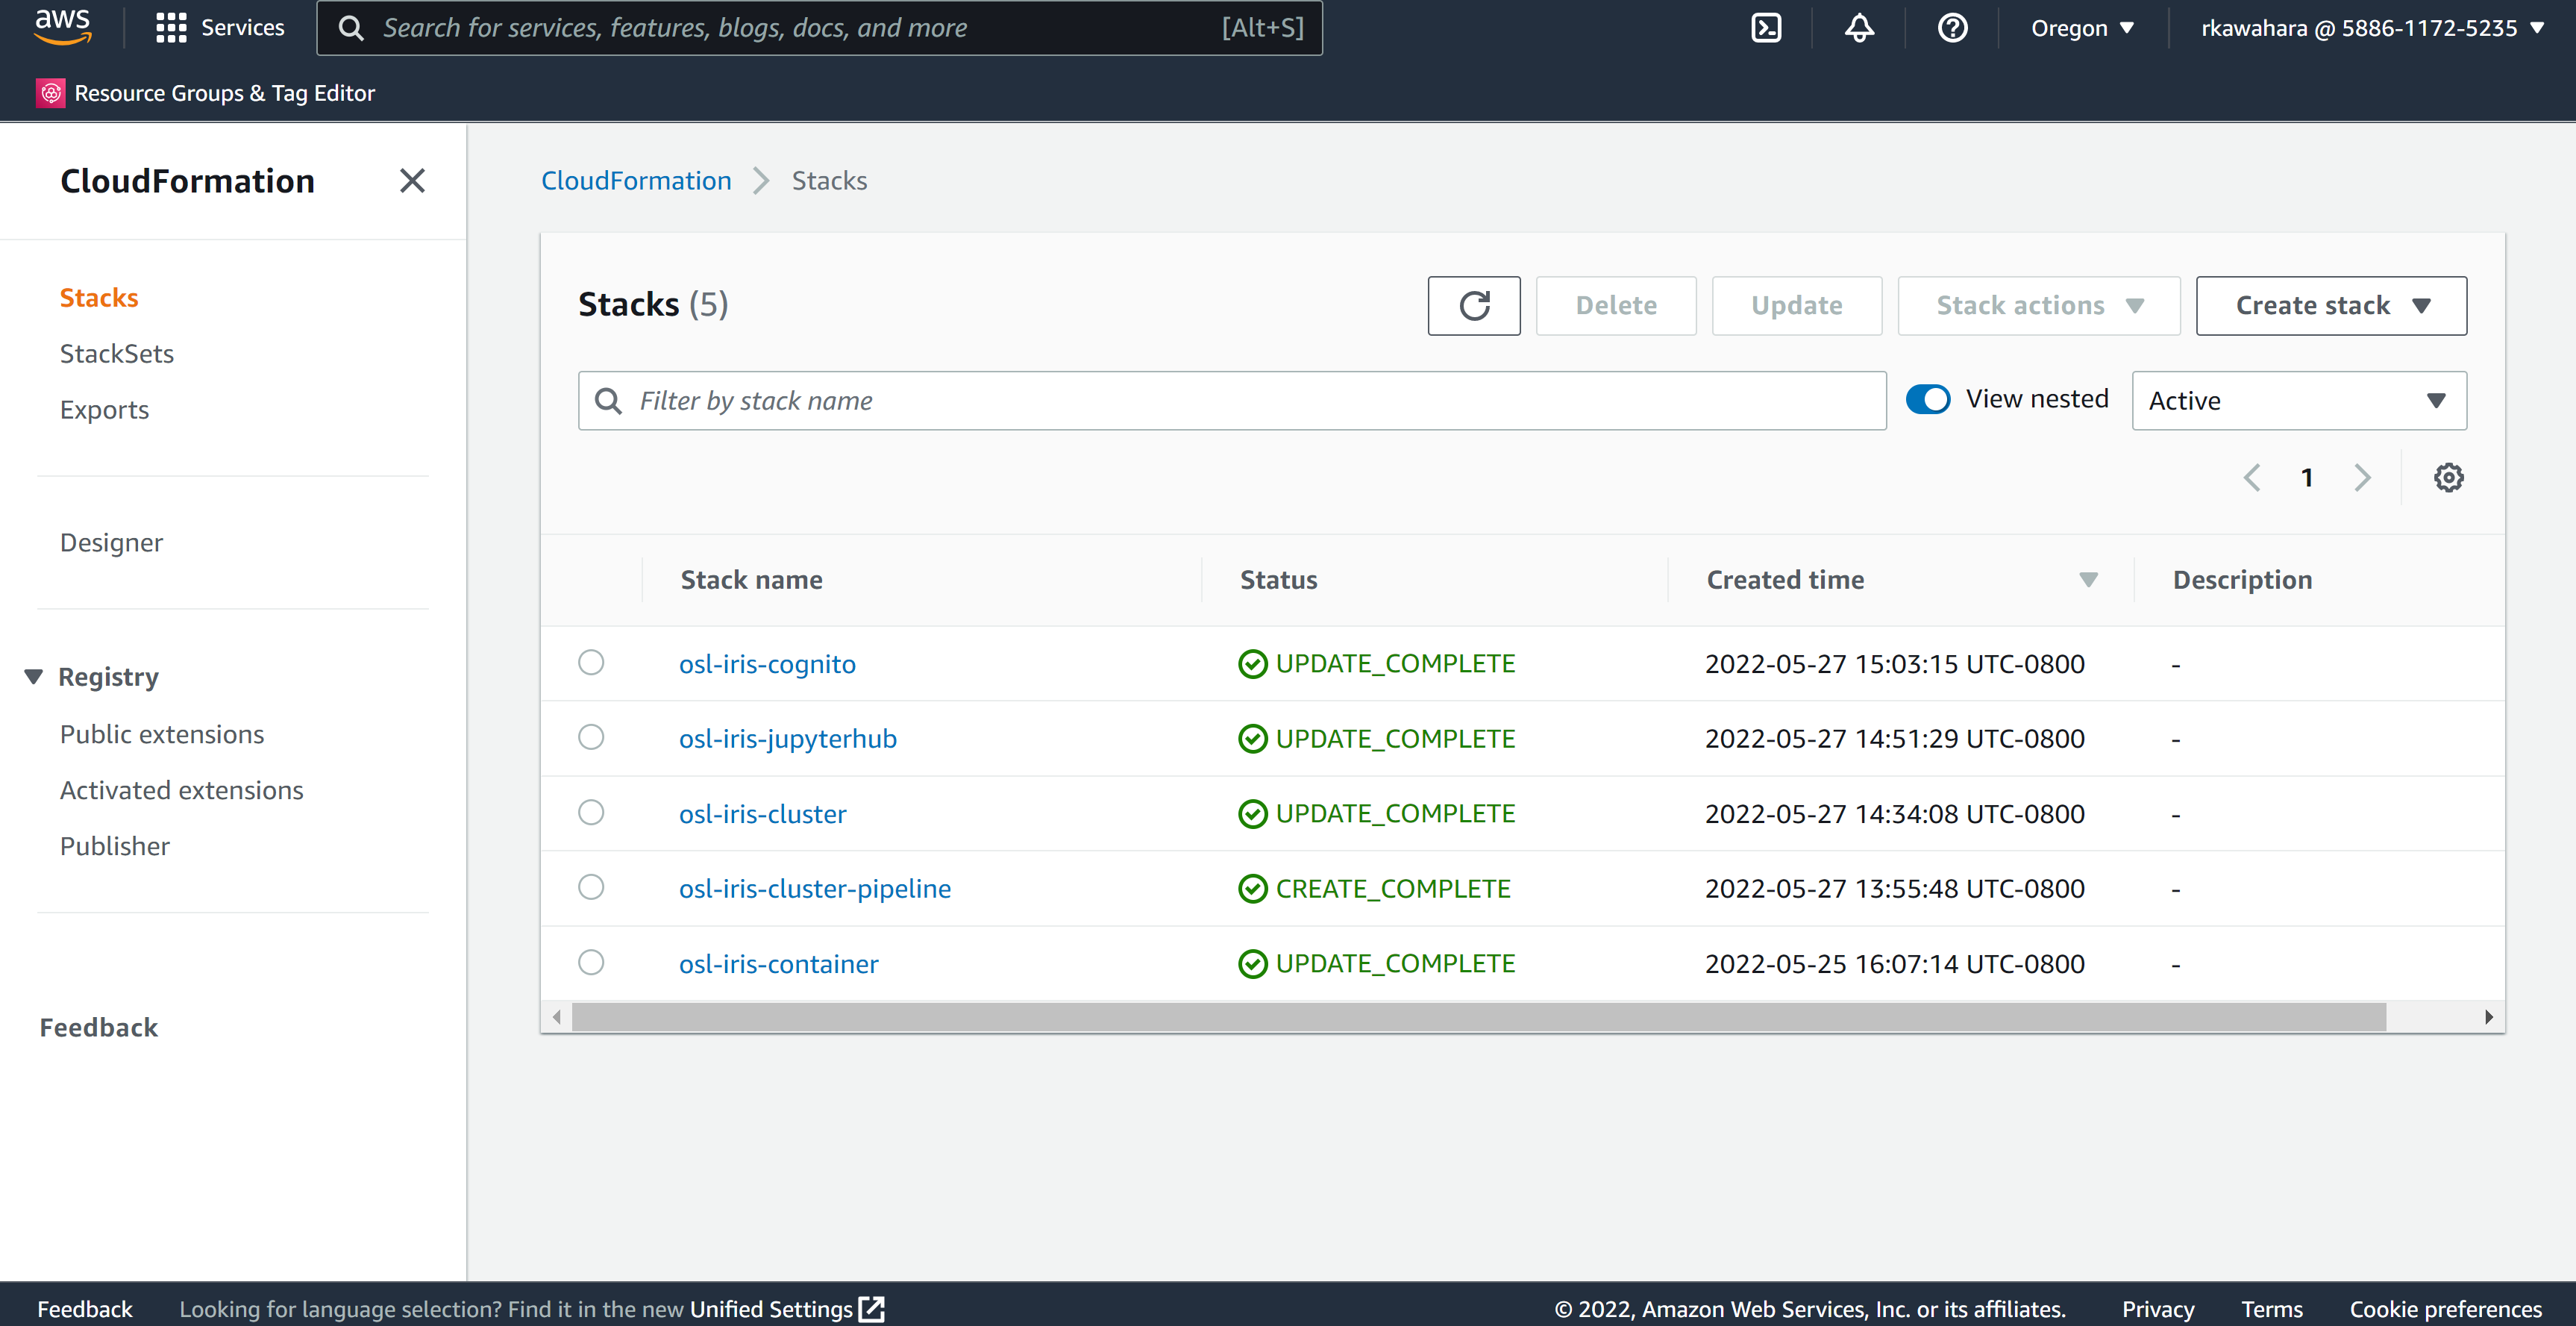
Because the order of removing deployment is essential, you will need to take down the CloudFormation stacks first. Deleting the following CloudFormation stacks will kill the deployment and remove its resources:
<deployment_name>-container<deployment_name>-clusterdeployment_name
NB: Do not manually delete any S3 buckets after emptying them in the steps below.
If you delete the buckets after emptying them, the CloudFormation stack deletions associated with those buckets will fail. To fix the issues regarding deleted buckets, you will have to recreate the empty buckets to proceed.
Therefore, let CloudFormation delete the S3 buckets for you once you empty them.
Follow the below instructions to properly delete these stacks.
Steps to Delete CloudFormation Stacks
1. Prepare to delete the <deployment_name>-container CloudFormation stack
NB: The <deployment_name>-container is independent of other stacks, i.e., the deletion order does not matter.
- Empty the
codepipeline-<region>-<deployment_name>-containerS3 bucket
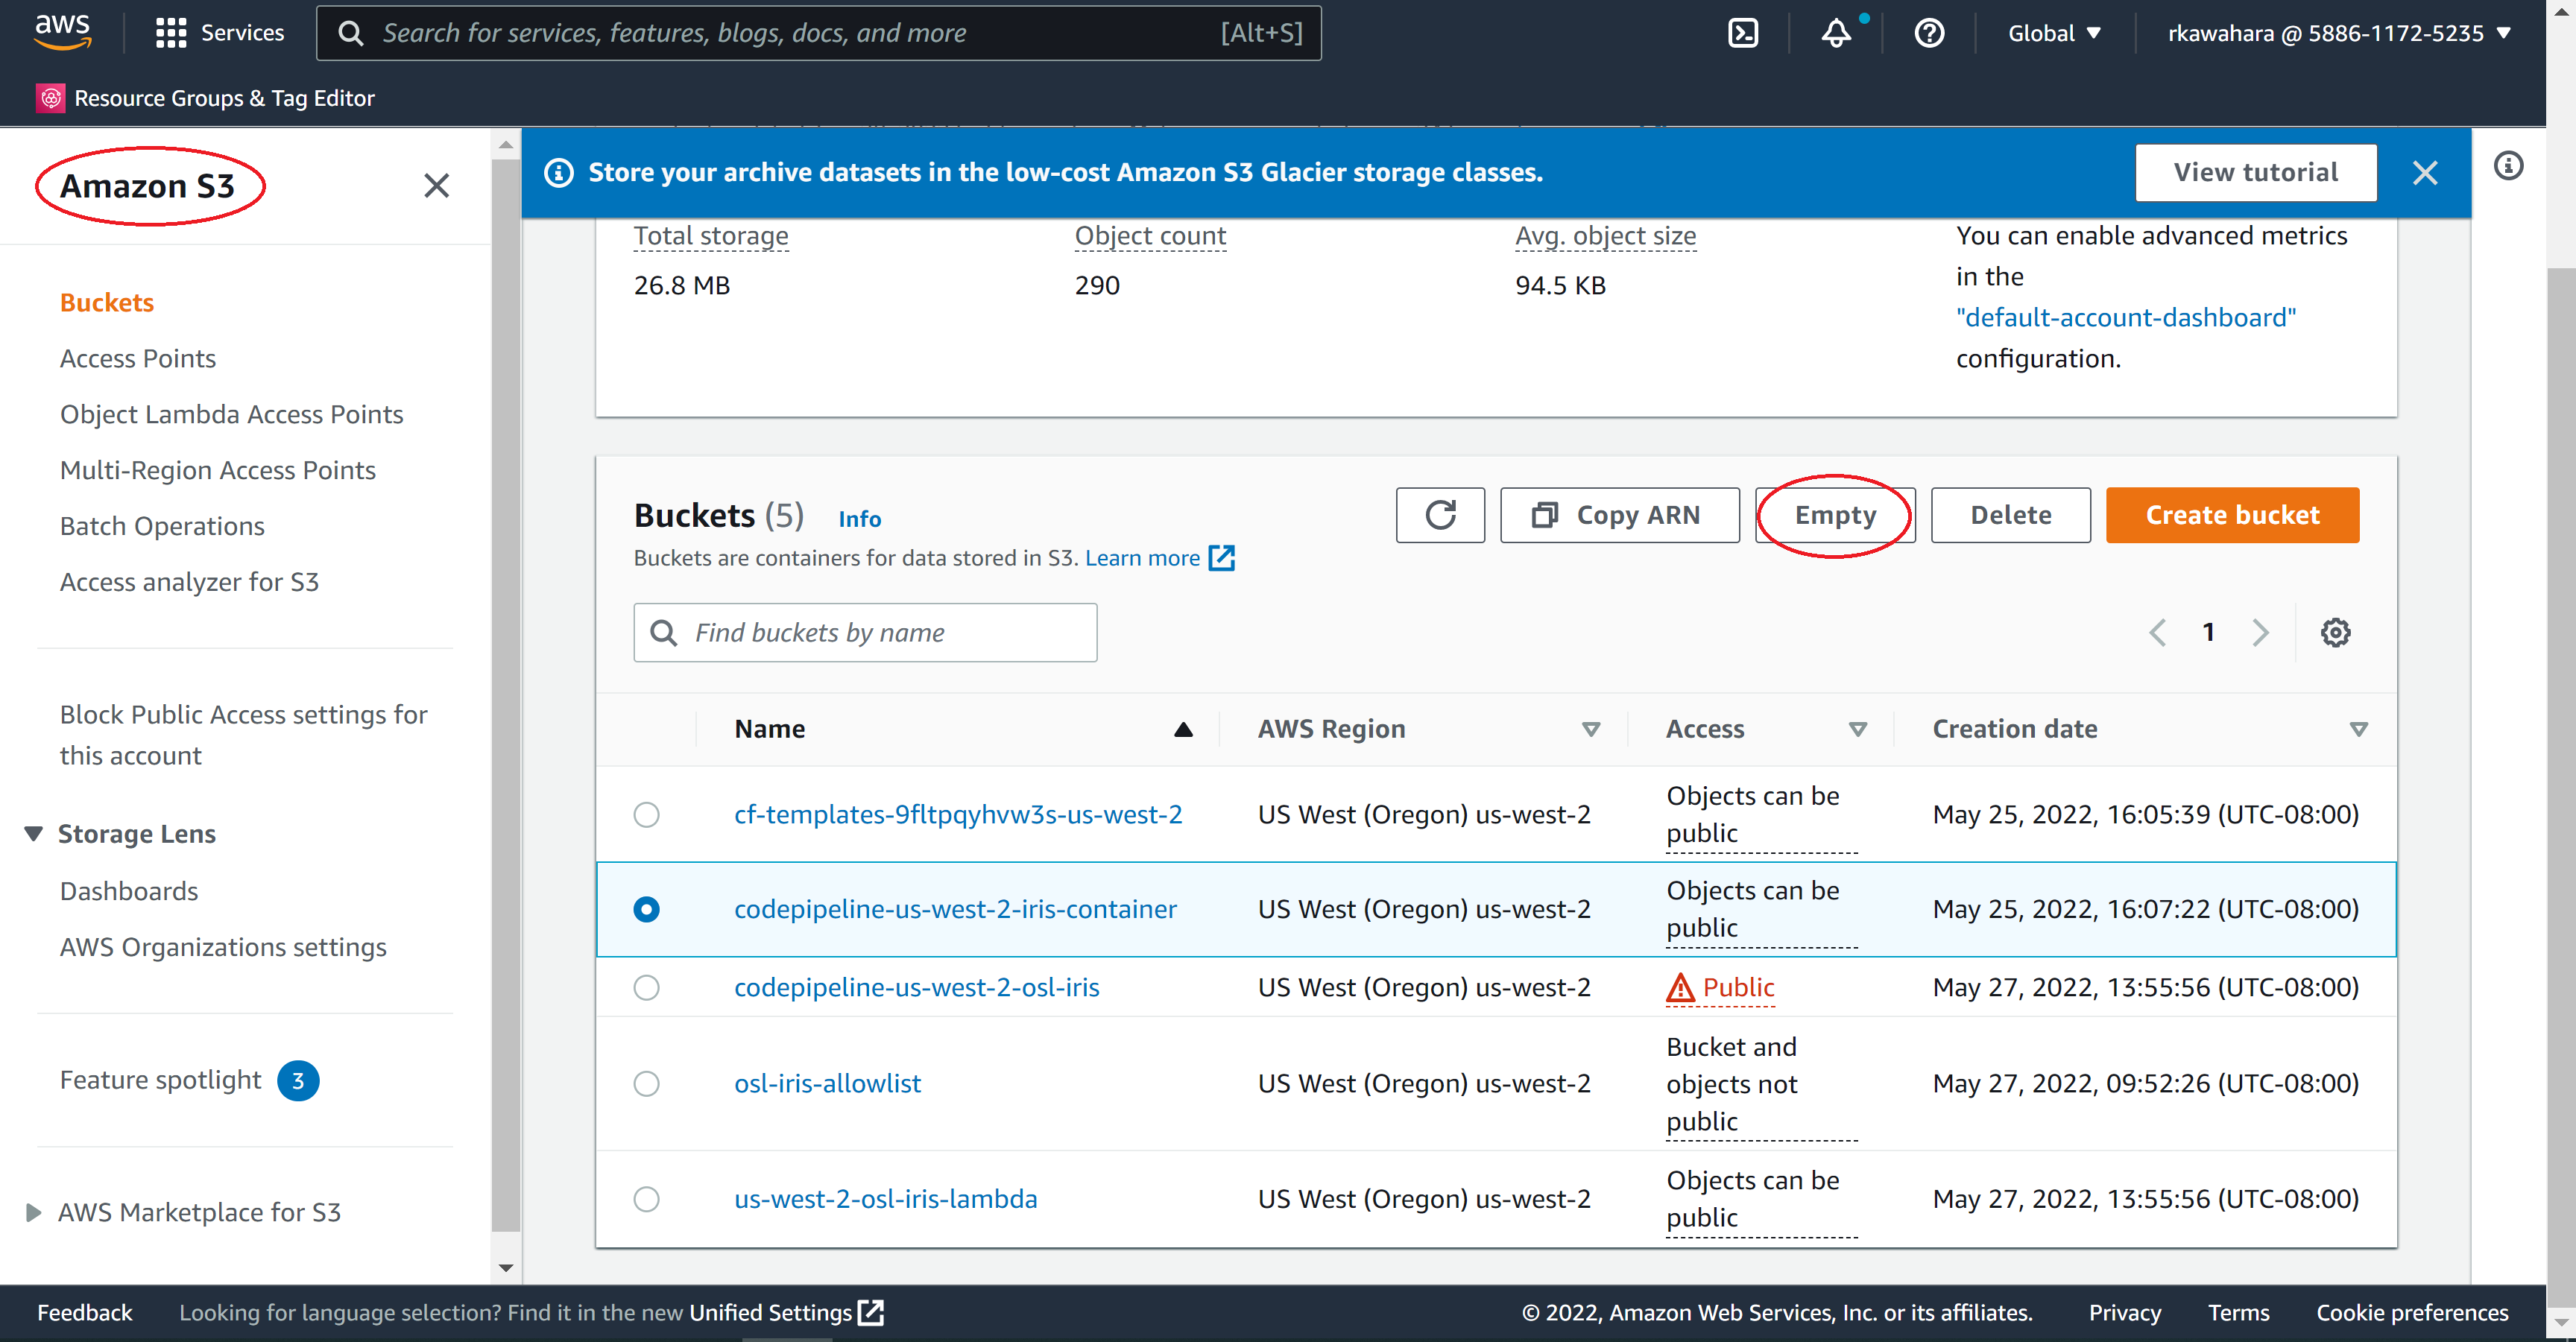
- Navigate to the AWS S3 console
- Click the
codepipeline-<region>-<deployment_name>-containerS3 bucket option. - Click the
Emptybutton- Confirm the deletion of bucket contents by typing
permanently deletein the provided field - Click the
Emptybutton
- Confirm the deletion of bucket contents by typing
- Click the
2. Delete ECR repos
- Navigate to the AWS Elastic Container Registry
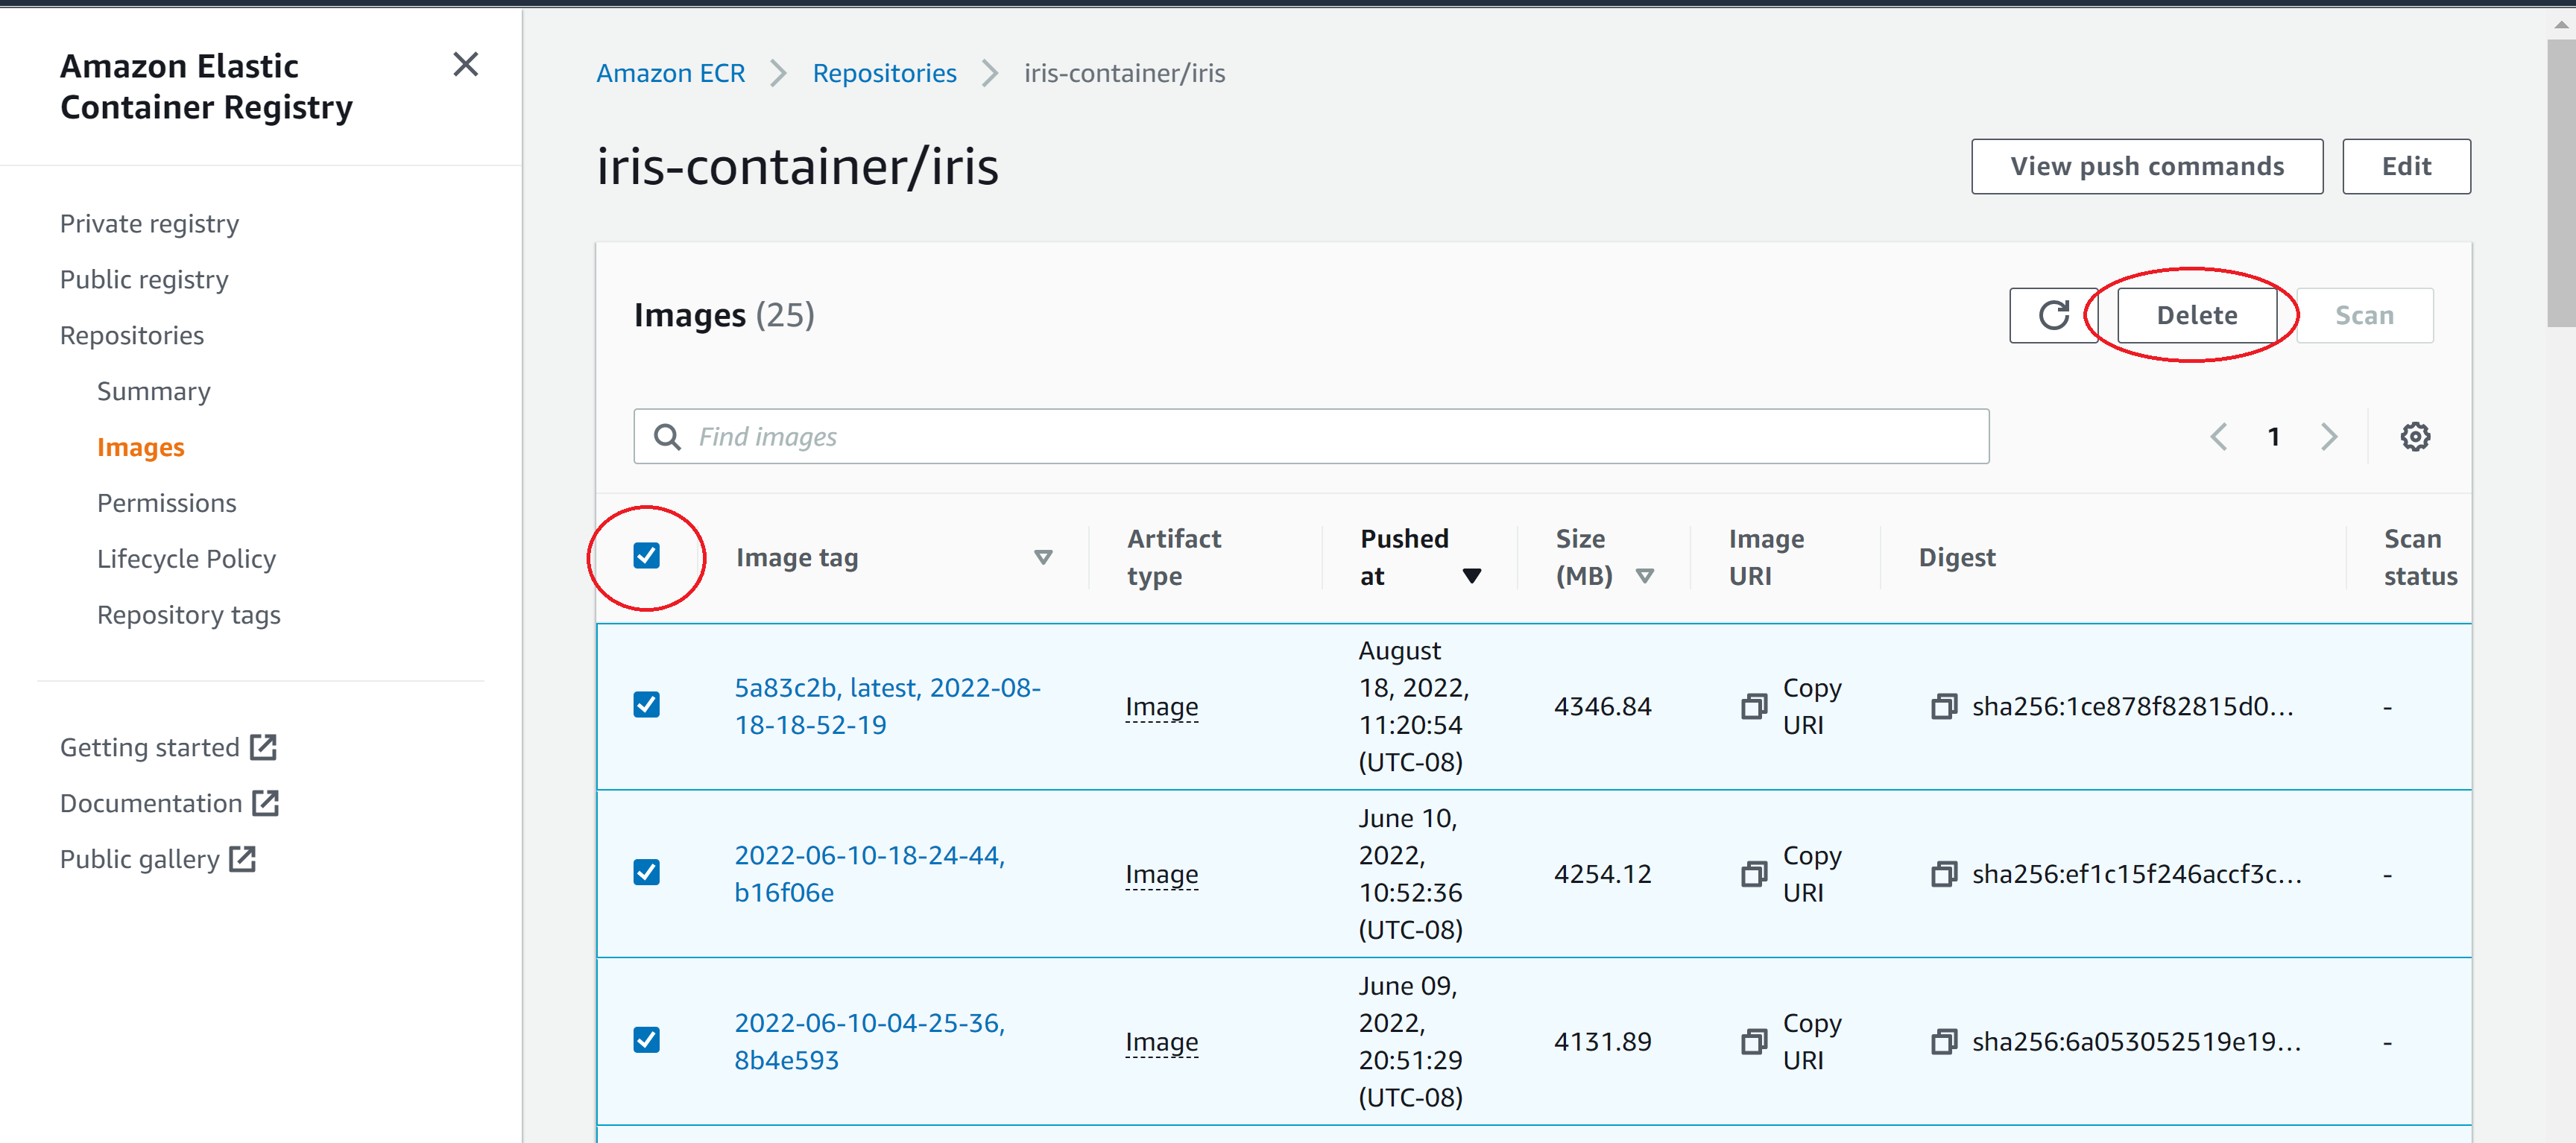
- Before deleting the ECR, you will need to empty them first.
- Click the repository name first and go to the individual ECR repository.
- Select all items by clicking the first box.
- Select
deleteand confirm the deletion.
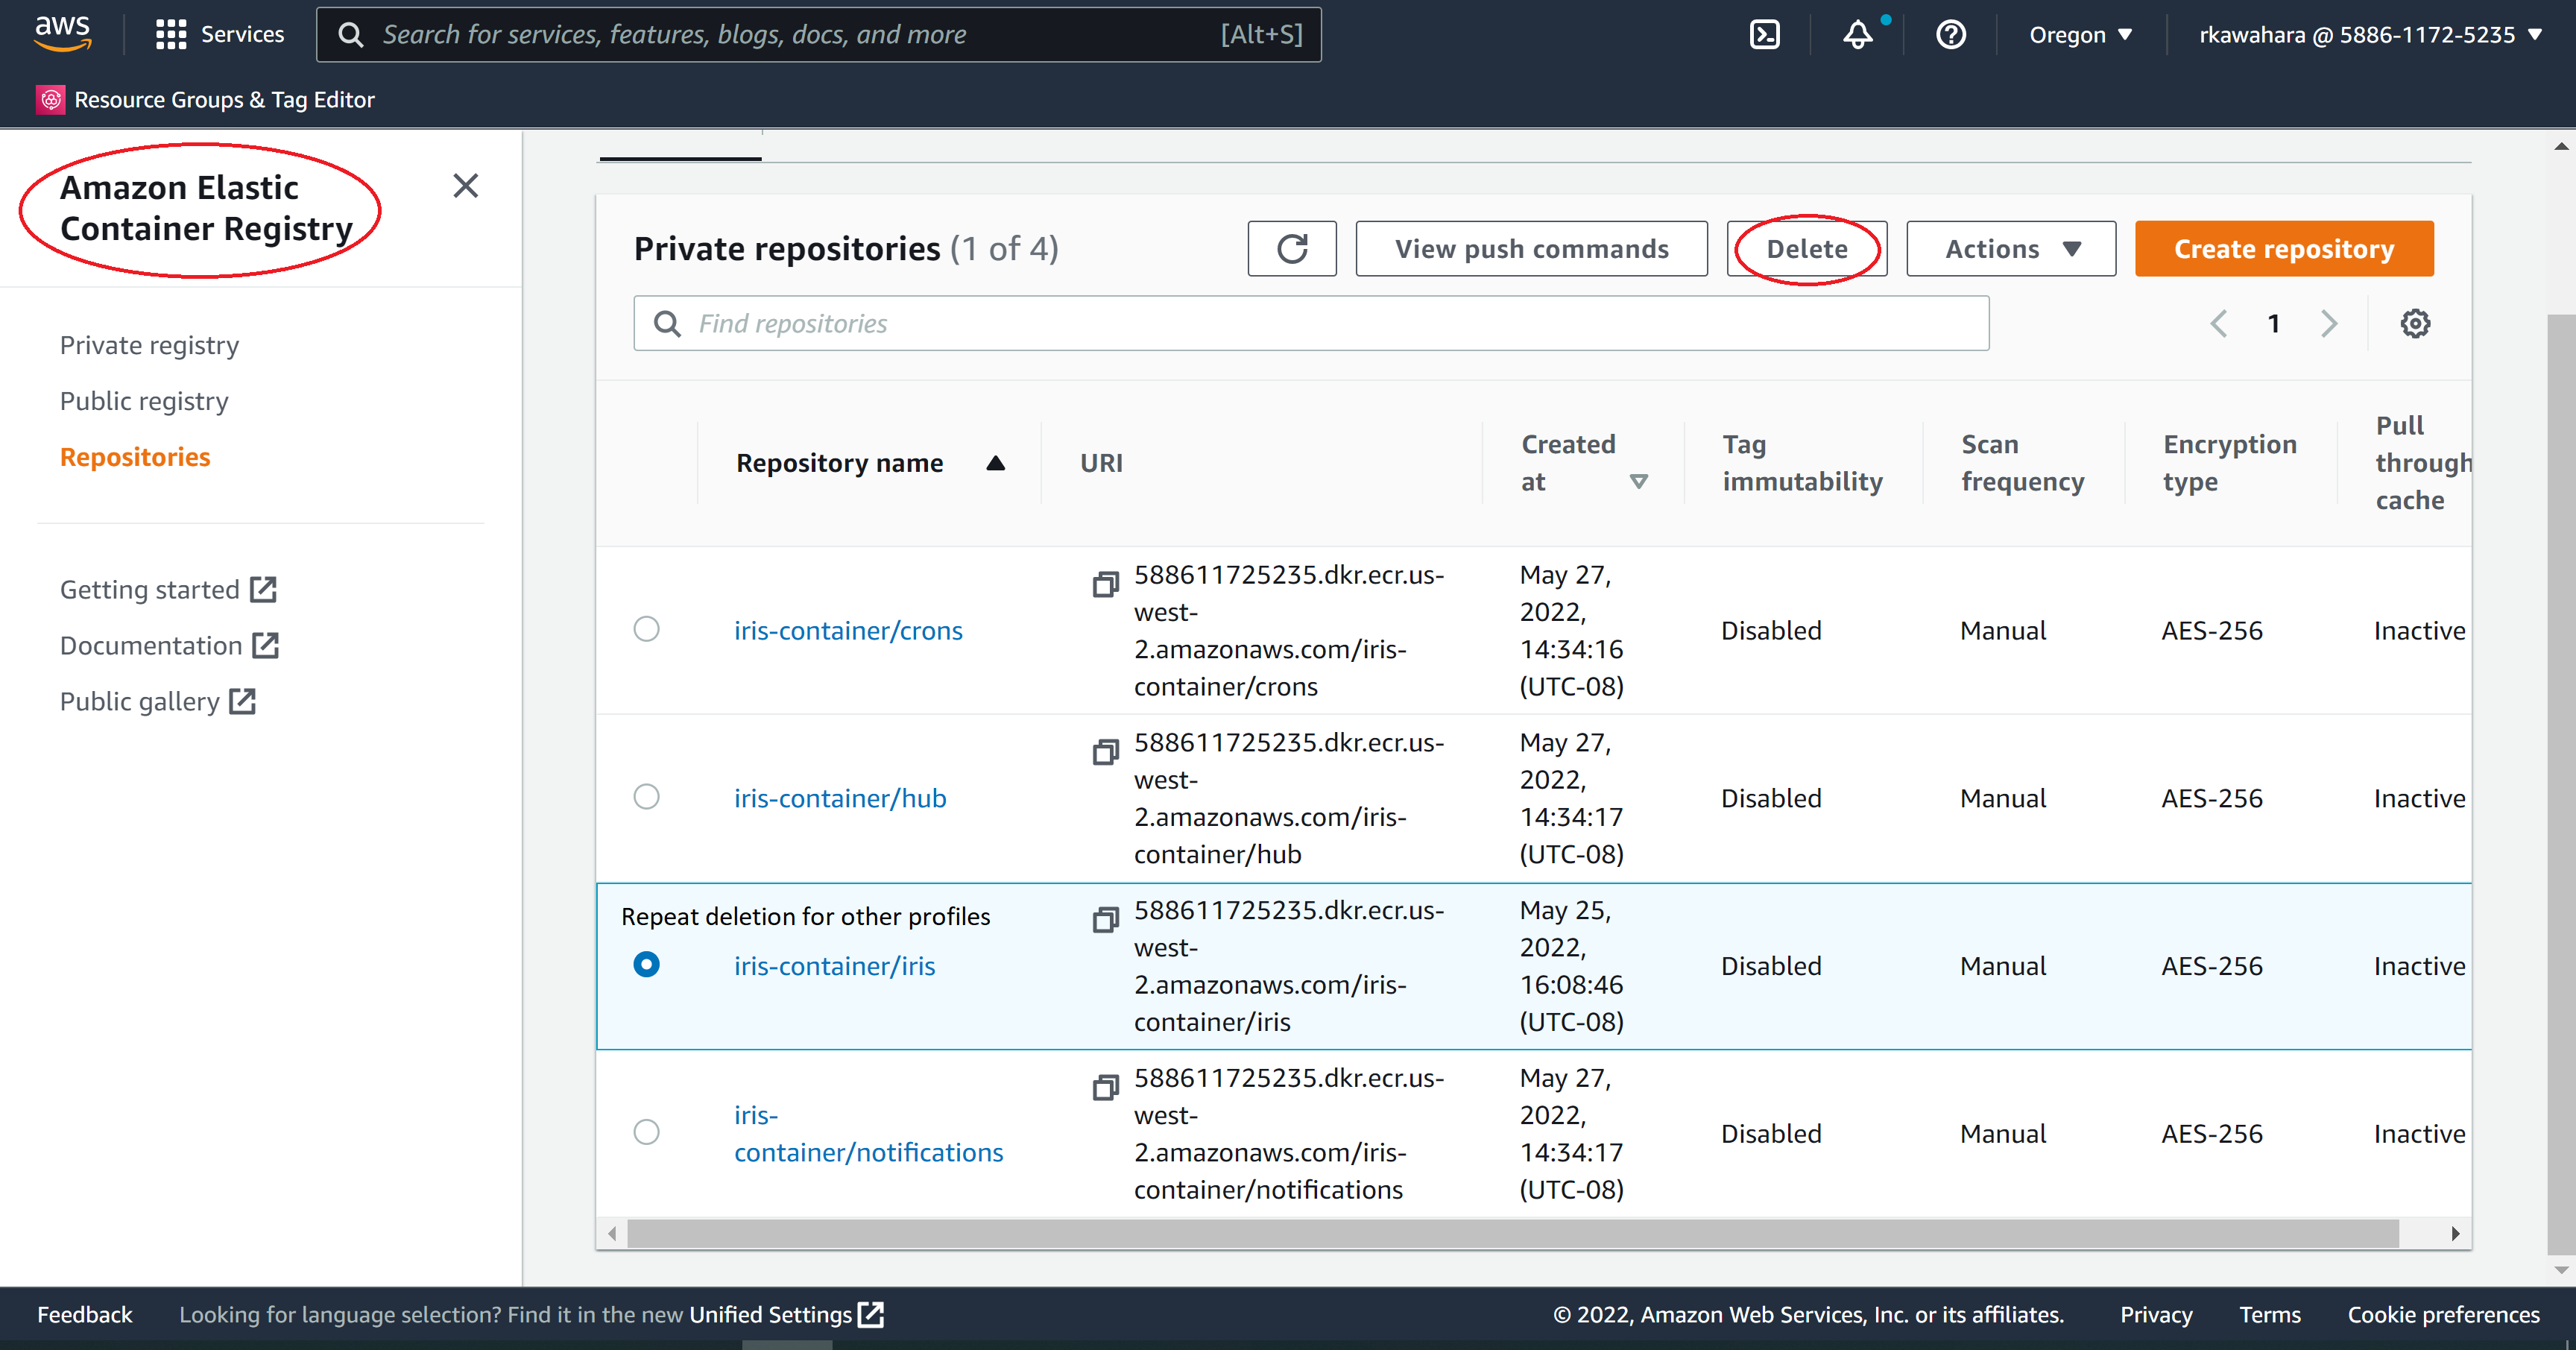
- Go back to the ECR Registry and click the option next to the empty
<deployment_name>/<profile_namespace>repository - Click the
Deletebutton- Confirm the deletion by typing
deletein the provided field - Click the
Deletebutton
- Confirm the deletion by typing
- Repeat for each profiles
3. Delete the <deployment_name>-container CloudFormation stack
- Navigate to the AWS CloudFormation console

- Click the
<deployment_name>-containerstack option - Click the
Deletebutton- Click the
Delete Stackbutton
- Click the
- Click the
<deployment_name>-containerstack name- Click the
Eventstab - Monitor the stack deletion progress
- Click the refresh button periodically since the console doesn't update events automatically
- Click the
NB: Stack deletion process will be similar to above instructions for other stacks.
Deleting the rest of the CloudFormation Stacks
Unlike the container stack, the deletion order matters for the rest. On the bright side, the deletion process should be similar to the container stacks.
Specifically, you will need to delete your stacks in the following order:
<deployment_name>-jupyterhubstack<deployment_name>-clusterstack- *
<deployment_name>-cluster-pipelinestack
NB:*These stacks have additional steps.
WARNING: As mentioned earlier, do NOT delete the <deployment_name>-cognito stack.
In above order, follow these steps (except for stack 3):
- Delete the
<deployment_name>-<stack_name>CloudFormation stack- Navigate to the AWS CloudFormation console
- Click the box next to the
<deployment_name>-<stack_name>stack - Click the
Deletebutton 1. Click theDelete stackbutton - Click the
<deployment_name>-<stack_name>stack name- Click the
Eventstab - Monitor the stack deletion progress
- Click the refresh button periodically since the console doesn't update events automatically
- Click the
- Click the box next to the
- Navigate to the AWS CloudFormation console
If you are deleting stack 3 (<deployment_name>-cluster-pipeline), you will need to follow these steps first before deleting the stack:
-
Delete
hubandnotificationsECR repos- Navigate to the AWS Elastic Container Registry
- Delete
<deployment_name>/huband<deployment_name>/notificationsrepository.
NB: Refer to the Delete ECR Repos section for how to delete ECR repos.
-
Empty the
codepipelineandlambdaS3 bucket- Navigate to the AWS S3 console
- Check the box next to the
codepipeline-<region>-<deployment_name>S3 bucket - Click the
Emptybutton- Confirm the deletion of bucket contents by typing
permanently deletein the provided field - Click the
Emptybutton
- Confirm the deletion of bucket contents by typing
- Repeat the same process for the
<region>-<deployment_name>-lambda
- Check the box next to the
- Navigate to the AWS S3 console
Delete EBS Snapshots and Volumes
To mitigate the cost associated with storage space, it is crucial to deallocate unused resources. The below steps will guide you on how to do so.
First, navigate to the AWS EC2 console - this step should be identical for both EBS snapshots and EBS volumes.
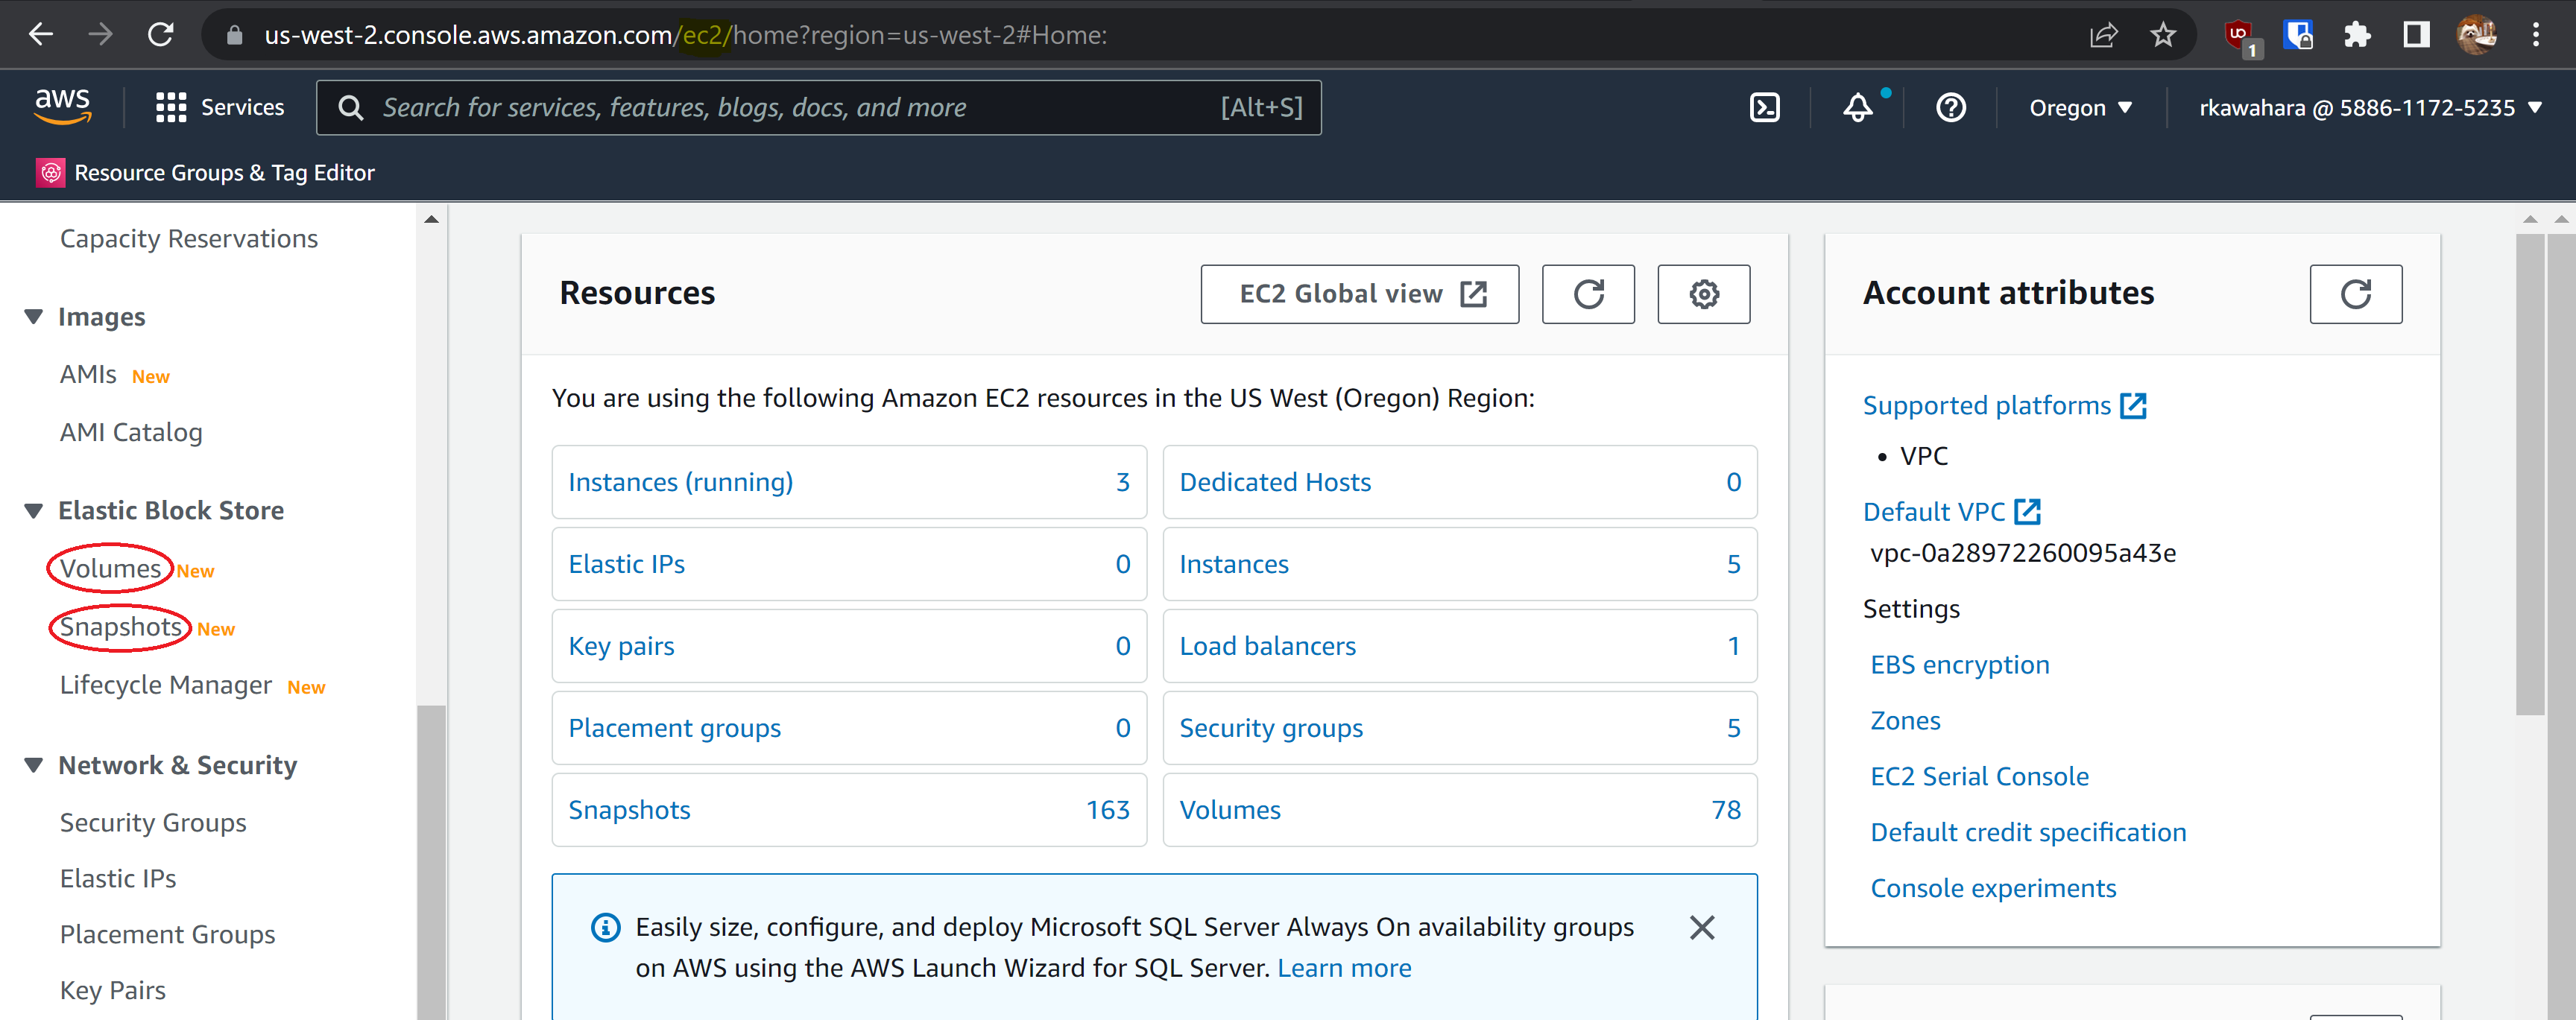
Delete EBS snapshots
- Click the Snapshots link in the sidebar menu
- Filter by
<cost allocation tag>:<deployment_name>- Double check that you filtered for the correct deployment!
- Select all snapshots
- Select
Deletefrom theActionsmenu - Confirm by clicking the
Yes, deletebutton
- Filter by
Delete EBS volumes
- Navigate to the AWS EC2 console
- Click the Volumes link in the sidebar menu
- Filter by osl-stackname:
<deployment_name>- Double check that you filtered for the correct deployment!
- Select all volumes
- Select
Delete volumesfrom theActionsmenu - Confirm by clicking the
Yes, deletebutton
- Filter by osl-stackname:
(Optional) Delete the CodeCommit repositories
This section will guide you on how to remove the <deployment_name>-container and <deployment_name>-cluster repositories located in the CodeCommit.
Important Note: Often, it would be in your best interest to preserve the CodeCommit repositories since the cost of maintaining them are minuscule.
If you believe that you may re-deploy the same deployment, you may want to ease future work in one of the following manners:
- Leaving these repositories in place, i.e., don't delete them.
- Download the zip of your repositories, store them in S3, and then delete them.
In another word, delete the CodeCommit repositories if and only if you are sure that you don't need them.
First, navigate to the AWS CodeCommit console:
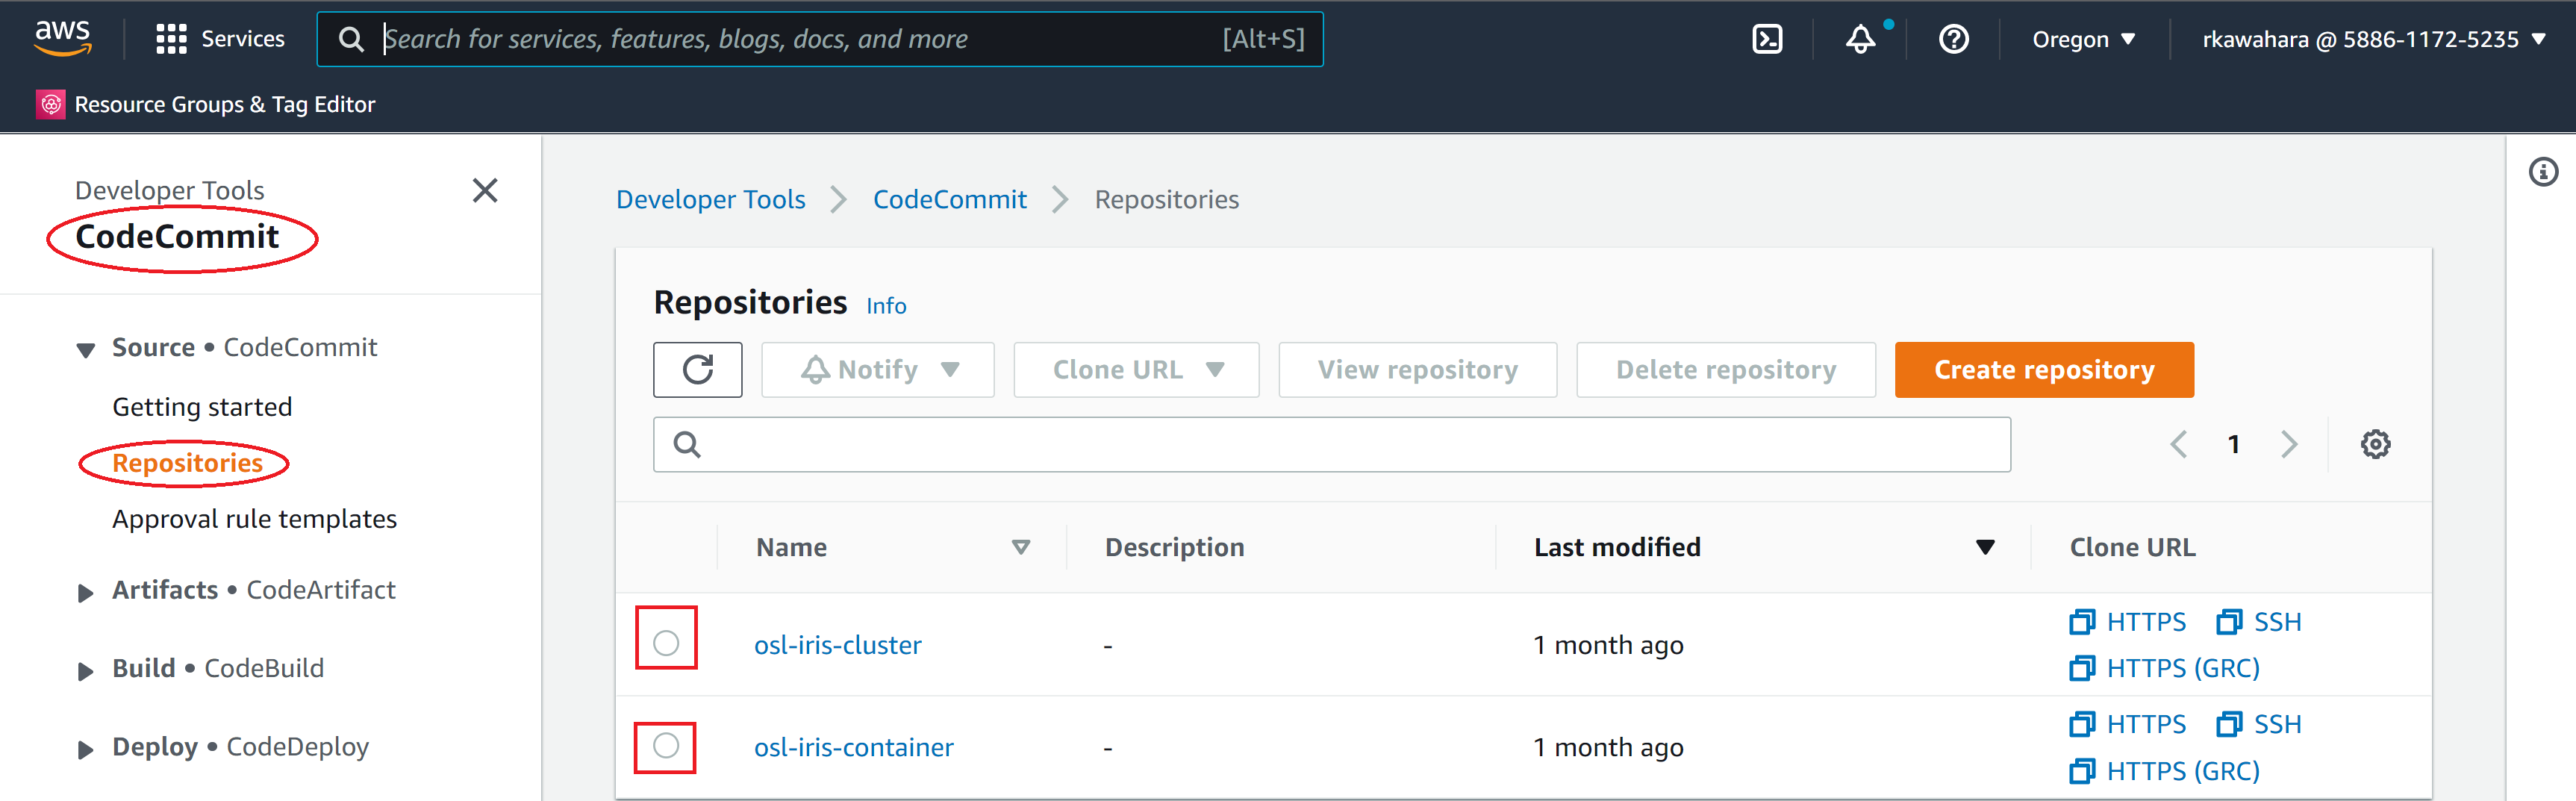
Then delete the <deployment_name>-container and <deployment_name>-cluster in any order. The deletion process for these two repositories is following:
- Check the option next to the repository
- Click the
Delete repositorybutton - Confirm the deletion by typing
deletein the provided field - Click the
Deletebutton
(Optional) Confirm that all resources have been deleted
Once you've taken down the deployment, you may want to verify the resource usage.
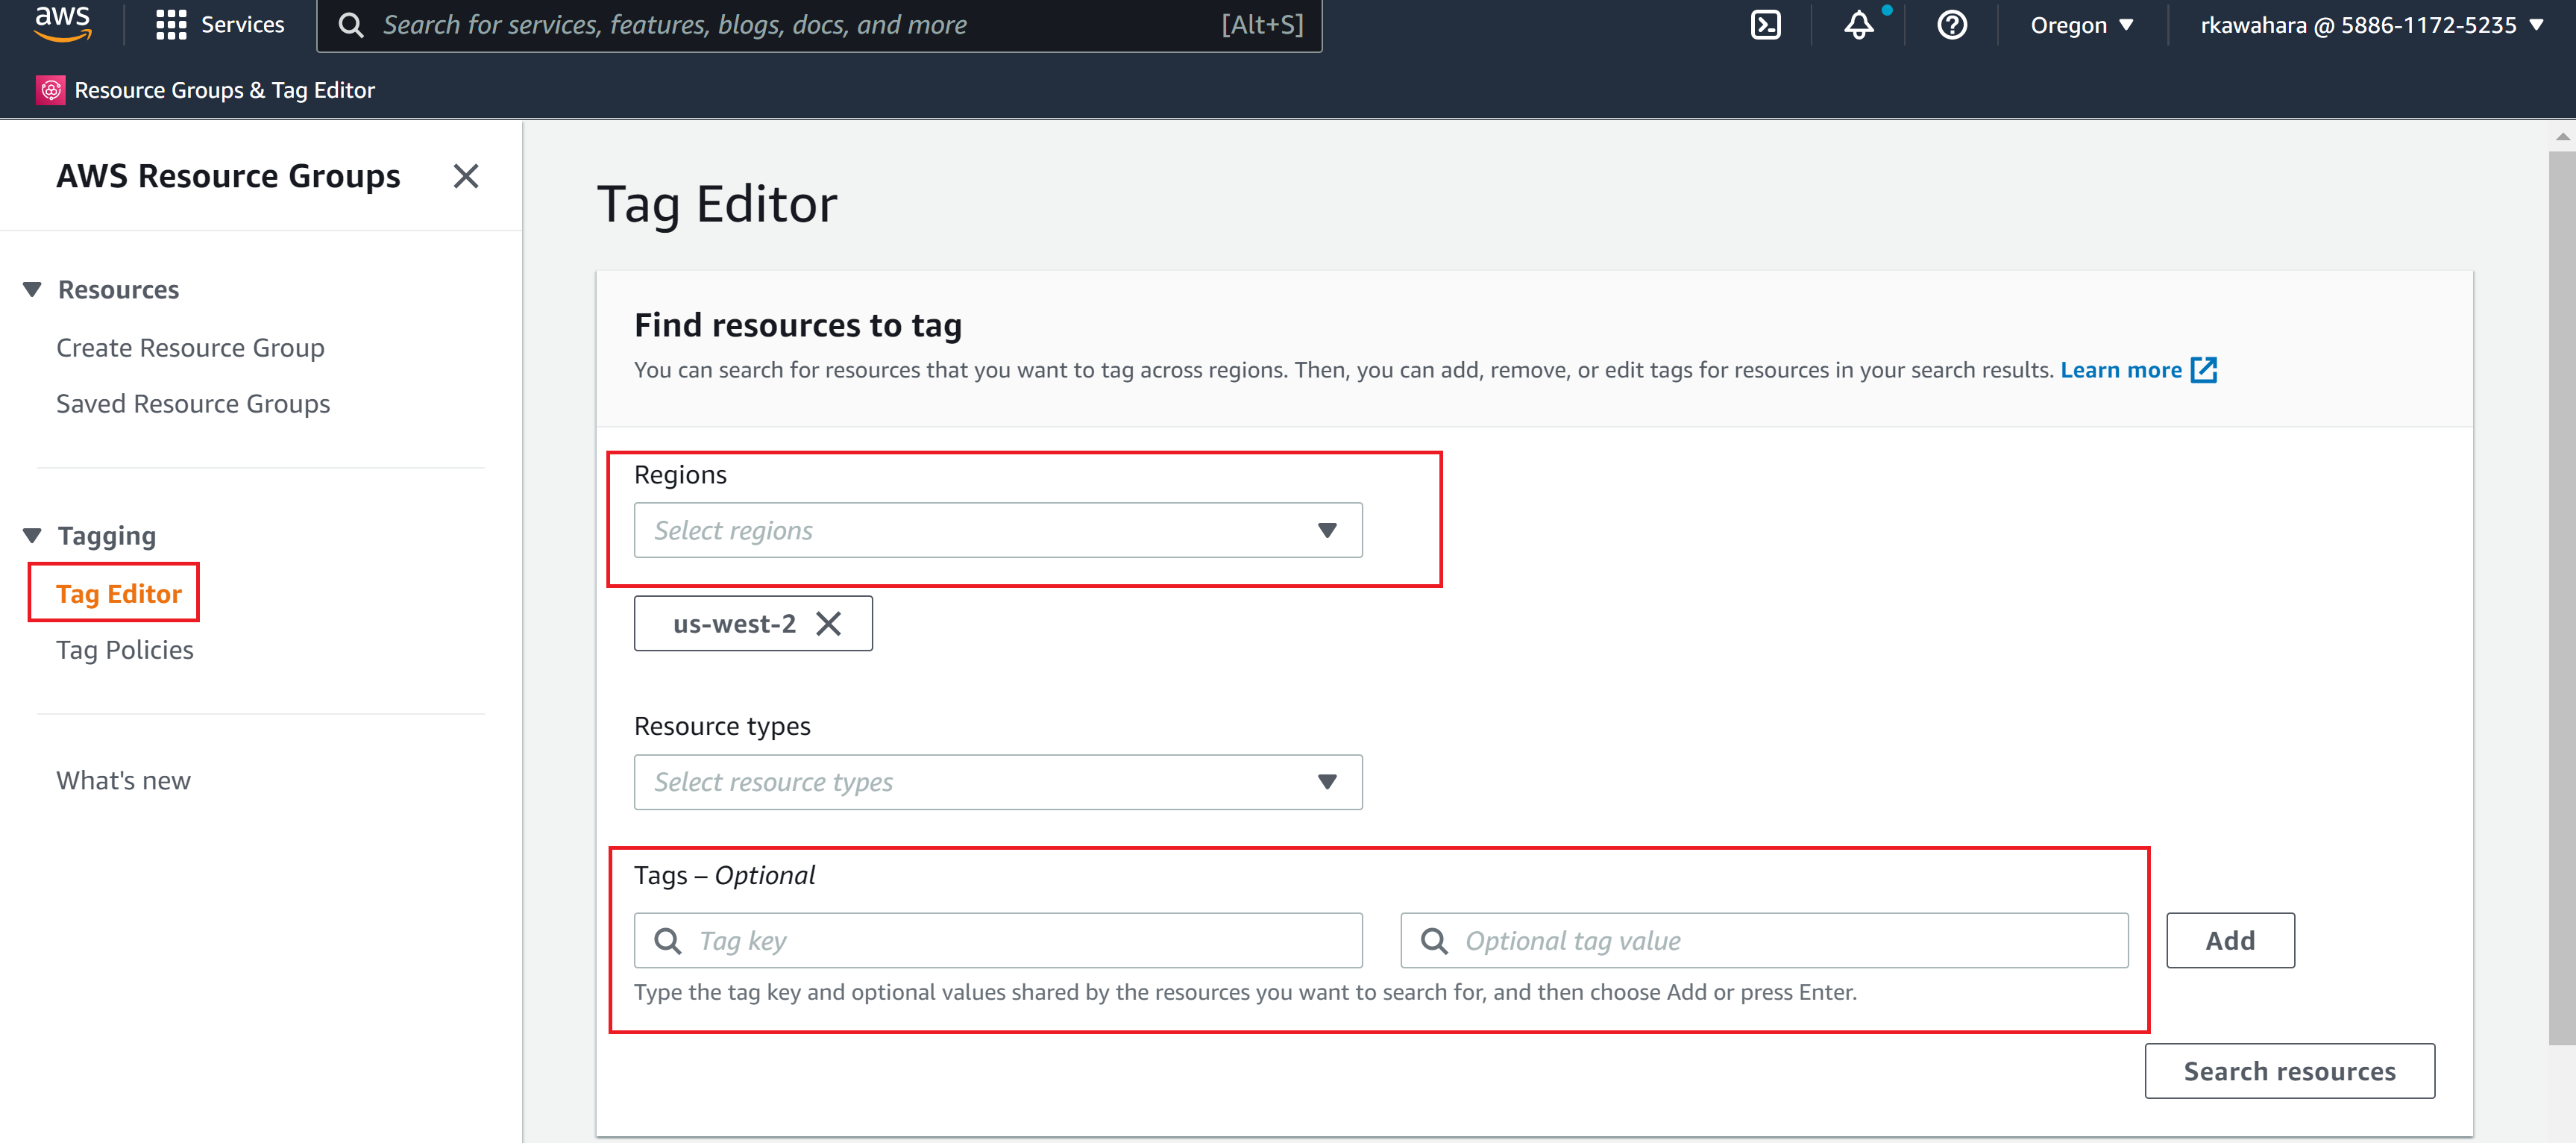
- Wait a day for deleted resources to update in the tag editor
- Navigate to the AWS Resource Groups and Tag Editor console
- Select the Tag Editor link in the sidebar menu and fill in the following:
- Regions:
<current-region> - Tags:
Key: Cost allocation tagValue:<deployment_name>
- Click the
Search resourcesbutton - Identify and delete any remaining resources
- Regions:
- Select the Tag Editor link in the sidebar menu and fill in the following:
Delete Calendar
Now that you are done with taking down the deployment, you will need to delete the calendar notifications.
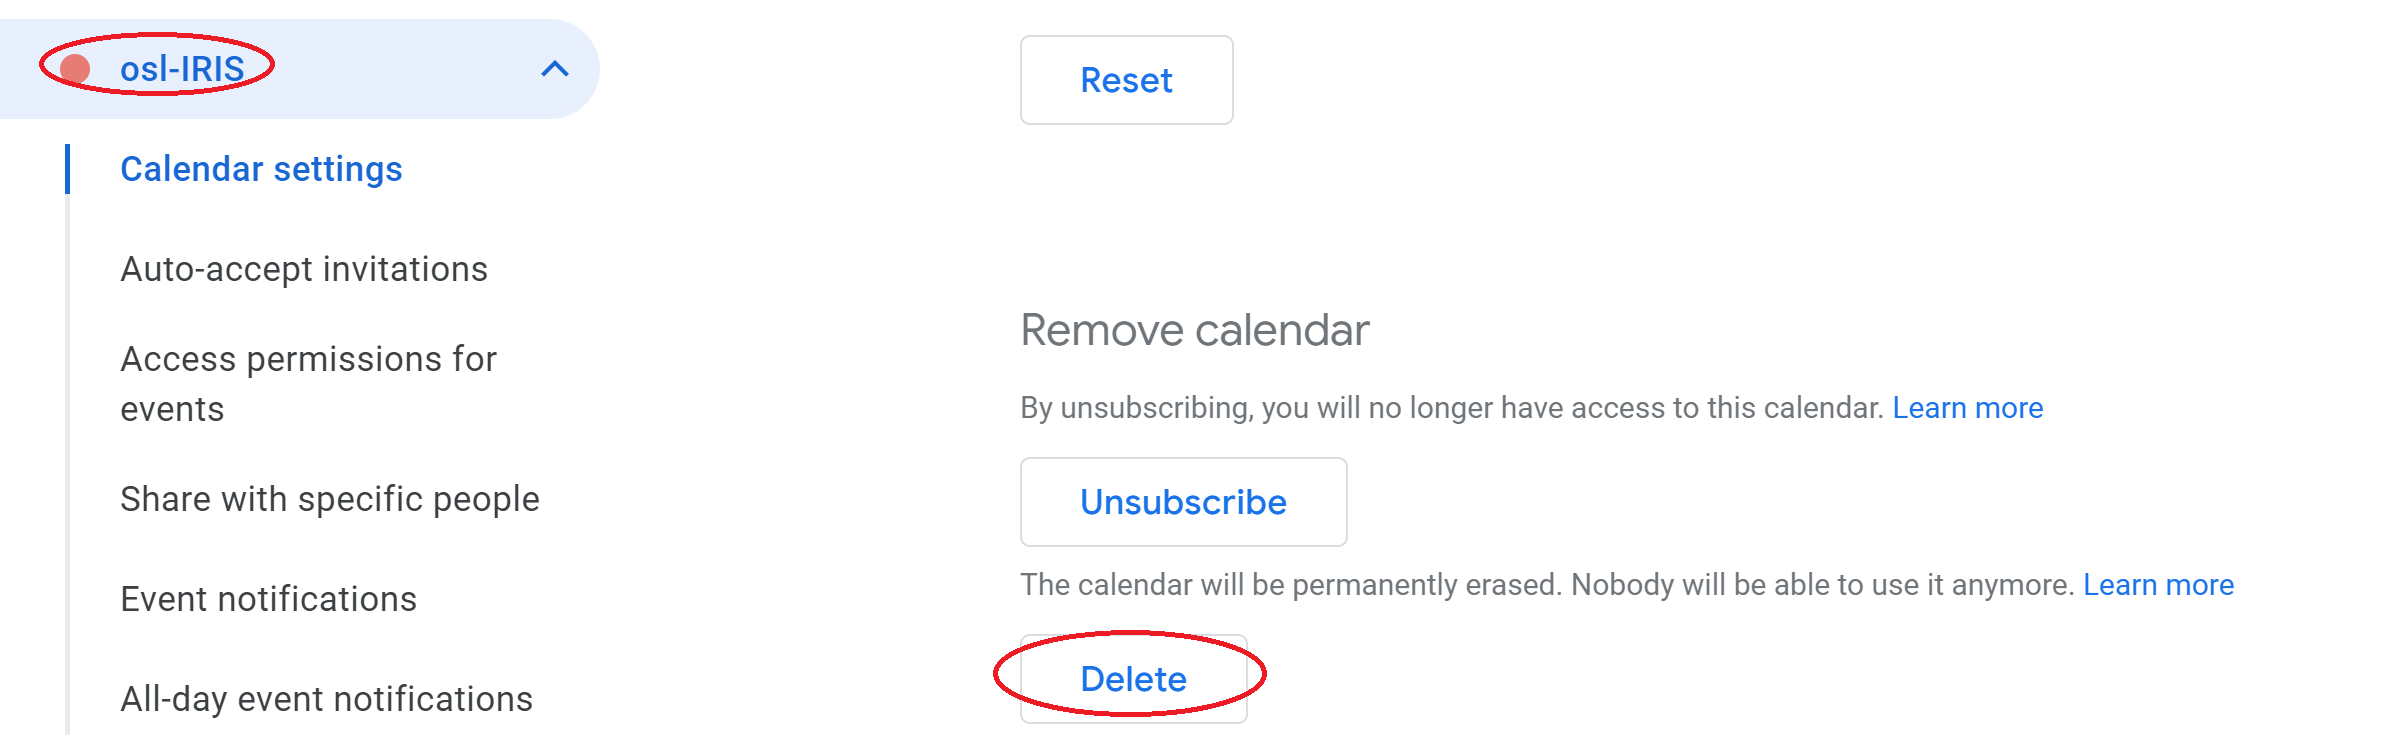
- Go to your Google Calendar
- Choose a deployment you wish to remove
- Open
Settings and Sharing - Click
Deleteunder Remove calendar